• After the first week of November, conditions deteriorated and skiing all but stopped for a few weeks. Freezing levels hovered around the 1800-2000m mark, with heavy rain below and heavy snow in the high alpine. Fast forward to the last week of November, the high alpine in the Sea to Sky had anywhere from 1.5 – 3 metres plus of snow on the ground, but tree line areas were thin, and below treeline terrain essentially had no snow at all.

    Fortunately, Blackcomb, followed by Whistler, were still able to spin the lifts. The resort skiing was just okay, and very limited, but the lifts provided easy access to high elevation terrain where the skiing was quite good.

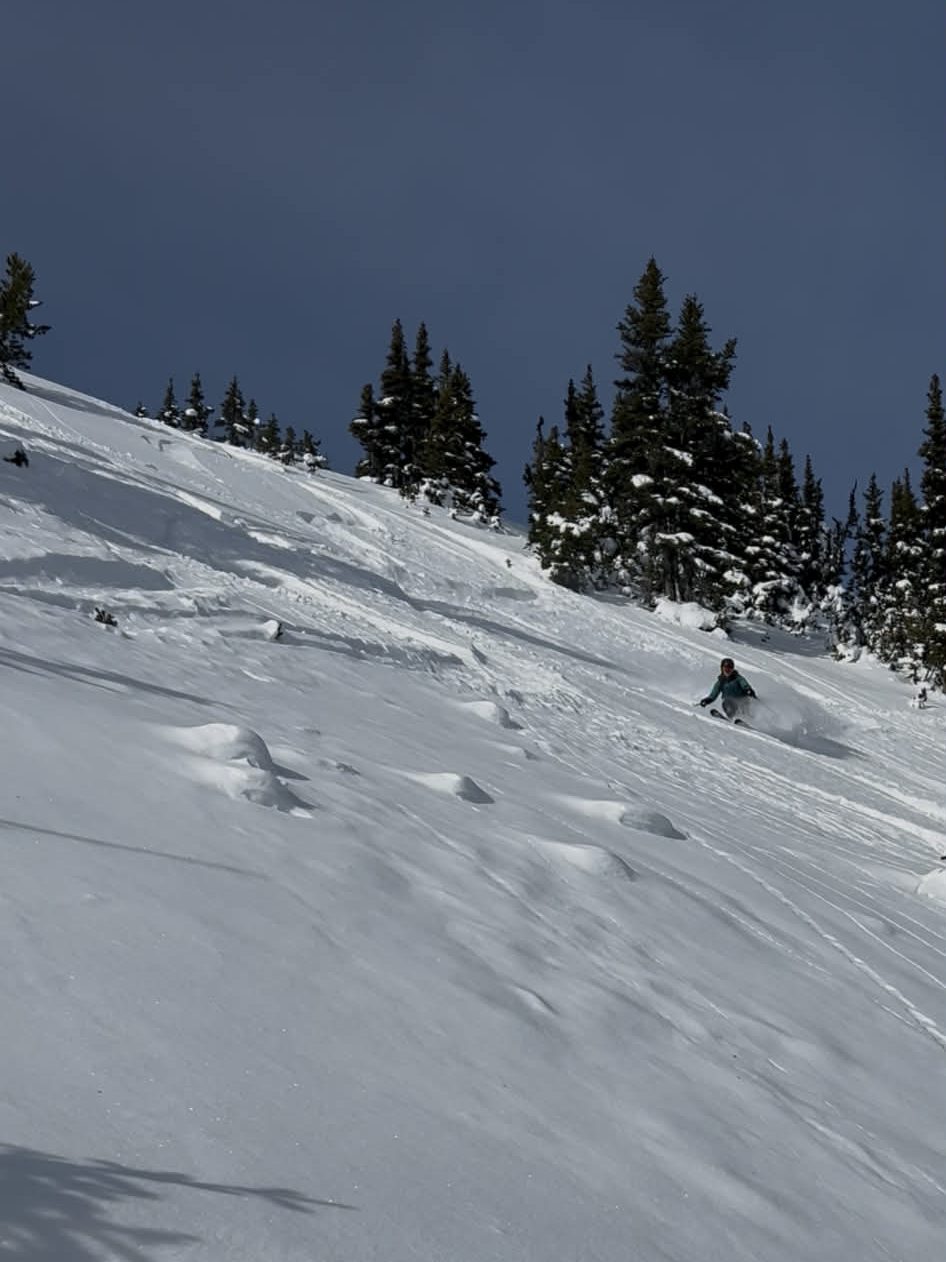
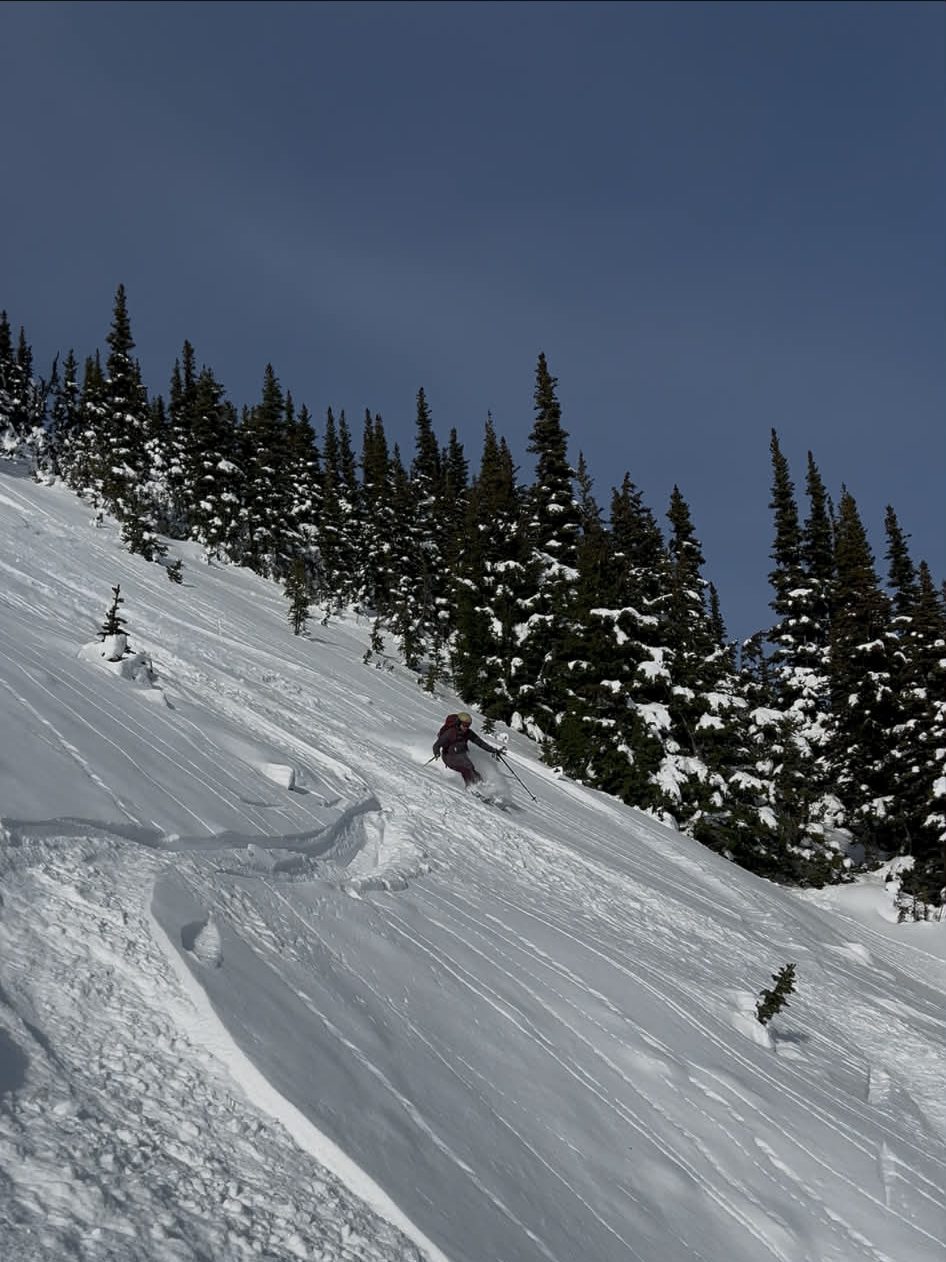
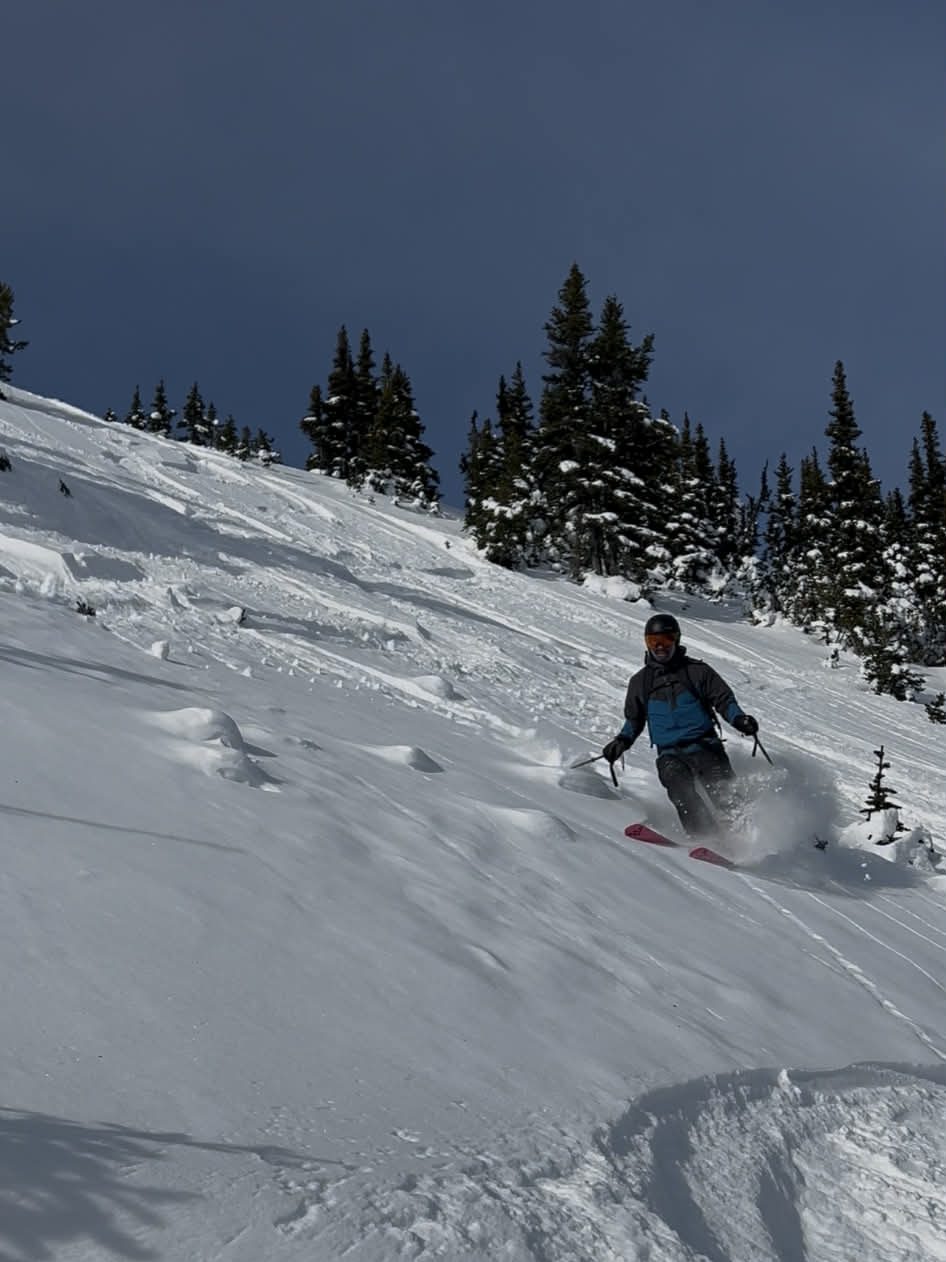
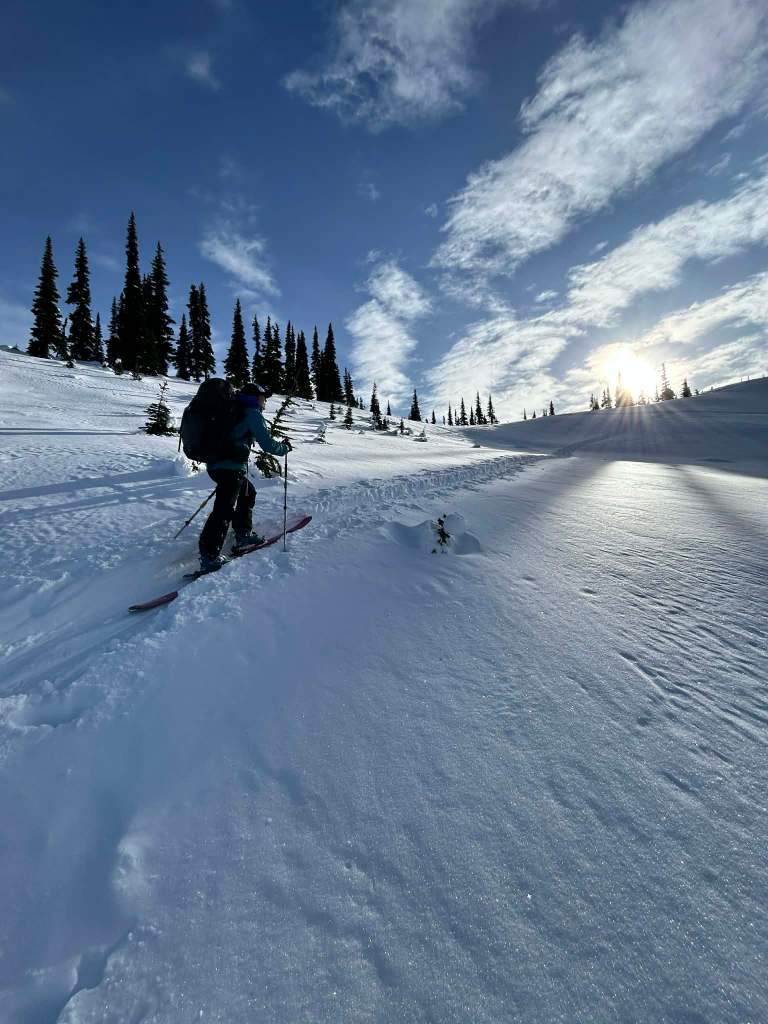
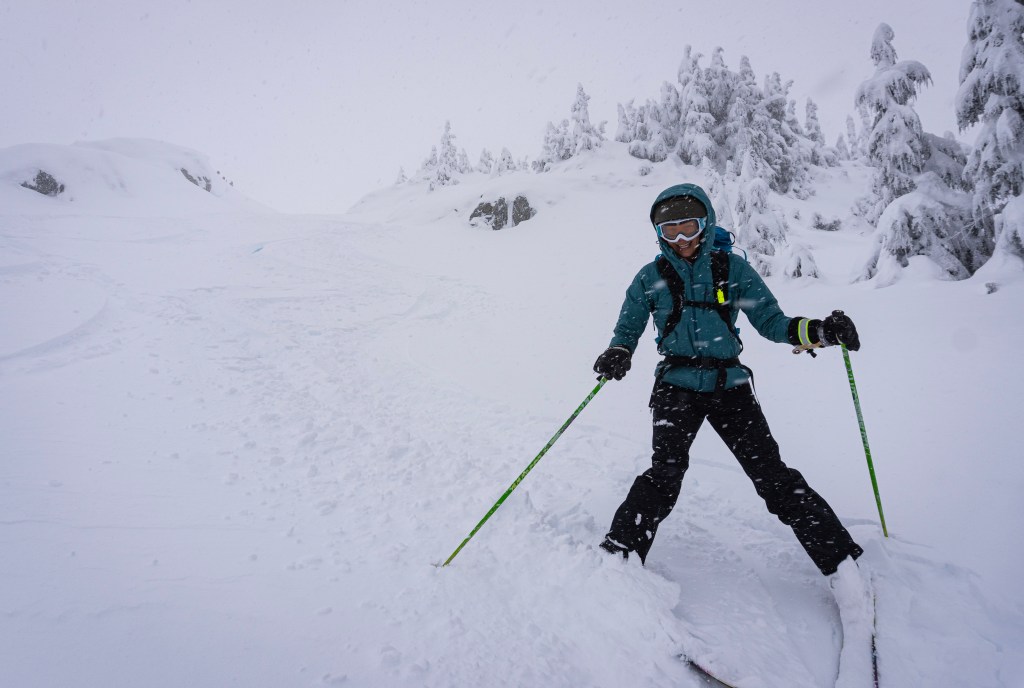
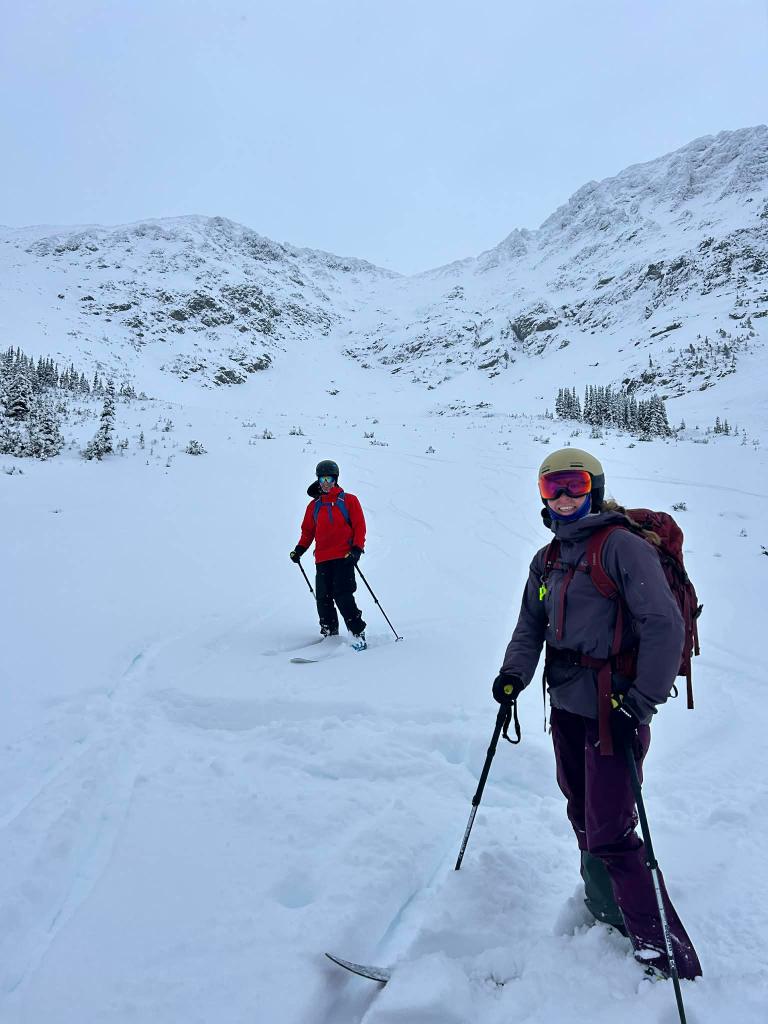
    On November 25th, AJ, Andrea and I went for a tour into the 7th Heaven area for Blackcomb Mountain. Our initial plan was to get to the top of the 7th Heaven Chair via the designated uphill track on Southside Green. We were then going to look down into the Horstman and Showcase area and decide if we wanted to drop into that area, or ski the runs towards Disease Ridge. After taking a look, we decided to head down towards Disease Ridge. We saw quite a few groups heading up the Stupid Traverse to ski lines into Blackcomb Glacier, but visibility was mediocre and we wanted to see where what we were skiing.

    We skied down Upper Cloud 9 towards Lakeside Bowl, and found some great turns. Then, below Lakeside Bowl, we dropped into Sluiceway and found some fantastic turns. Although HS was only about 70cm’s as we got lower, about 30cm’s of fluff was sitting on a very supportive crust that bridged all the early season hazards lurking below. Our initial plan was to then transition and skin up Disease Ridge and do a lap off the ridge into Body Bag Bowl, but, after skiing a great lap down on our first run, we decided to just do that same run again. Go with what you know.

    After a second lap, we toured our way back up to Southside Green and cruised back to the ski resort. A lovely day out. Expectations were indeed exceeded.

    Patrol Cabin at the top of 7th Heaven. Winter can be found up here.
    Andrea repping many shades of purple at the top of 7th. It was nice having some colour on an otherwise monochrom day!
    Nice turns below Blackcomb Lake
    All smiles from Andrea and AJ after finding some November powder turns. The snow was excellent, low density fluff.

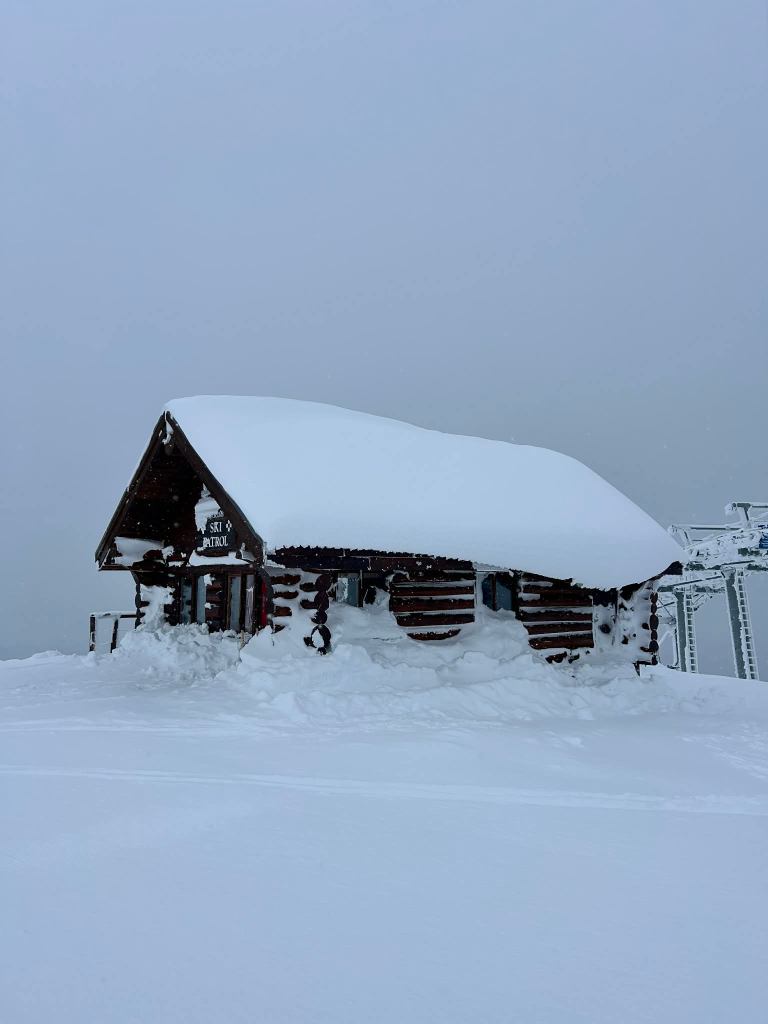
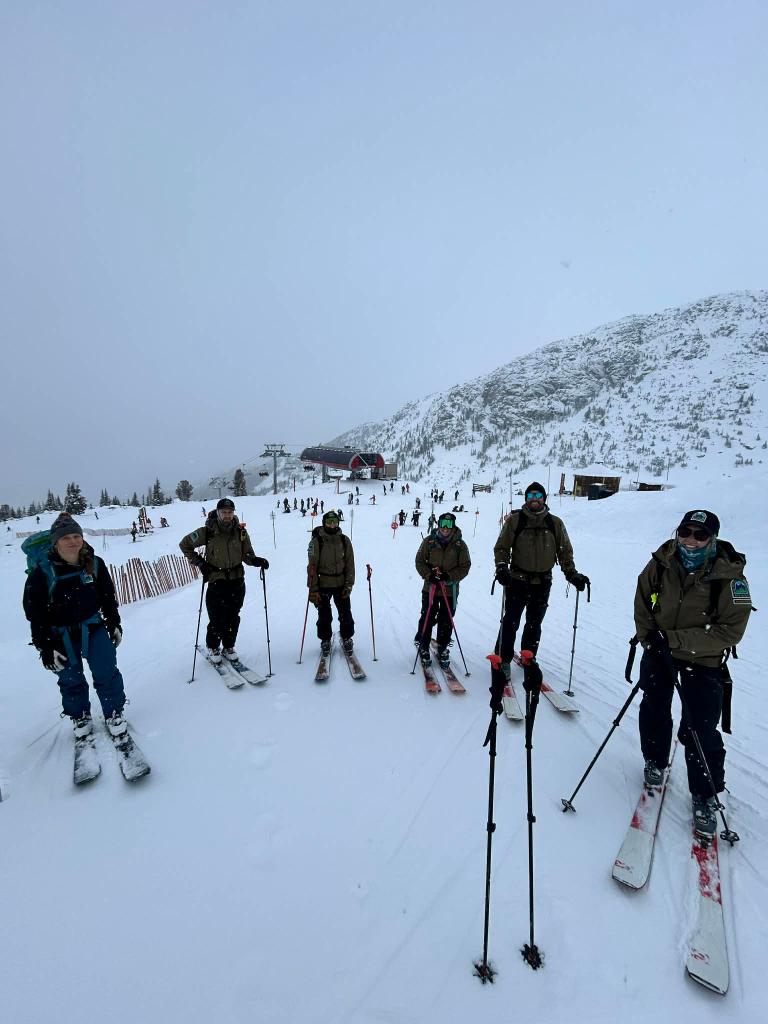
    November 27th on Blackcomb with the BC Parks Crew.

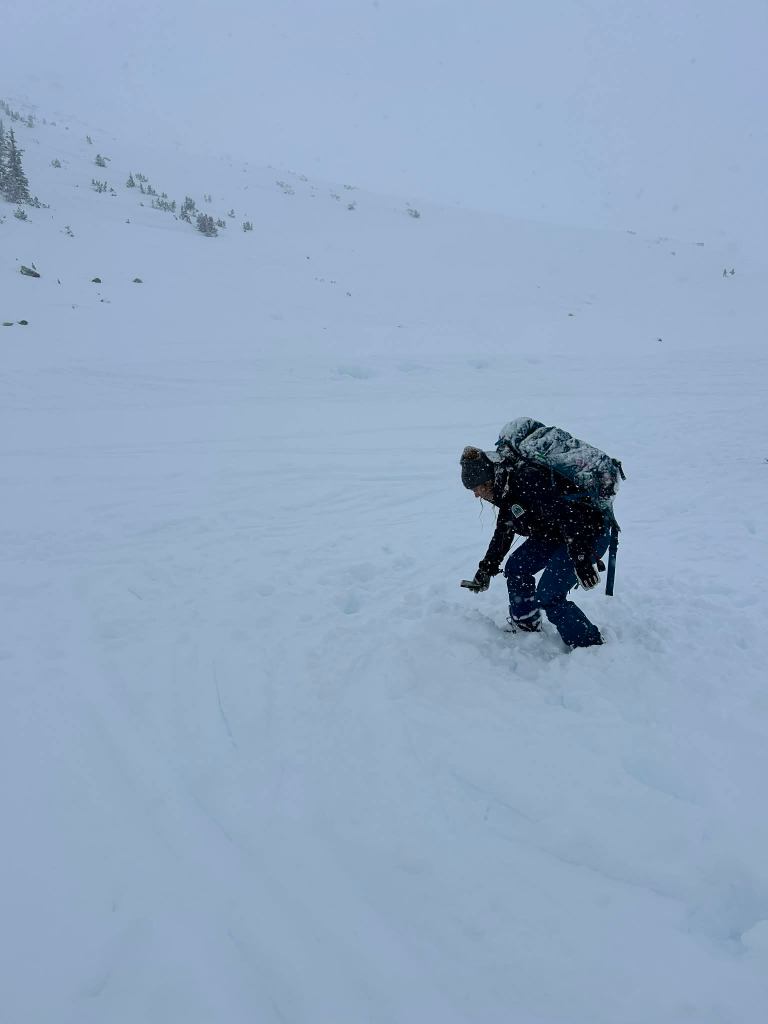
    Two days later, I was heading back up Blackcomb with my fellow BC Parkies. I was there with the crew to facilitate the annual companion rescue signoffs to get the team ready for the winter season. I’m always impressed with the skillset and professionalism demonstrated from my coworkers. They did a great job with the companion rescue scenarios, and we were able to then focus on other topics like effective first aid in cold environments, and strike team shovelling. It’s always a good idea to get those rescue skills dialled in at the start of the season, and to continue practicing throughout the winter. Great job, crew!

    The Parkies heading up Southside Green
    A fine search, indeed!

    November 29th – Garibaldi Lake

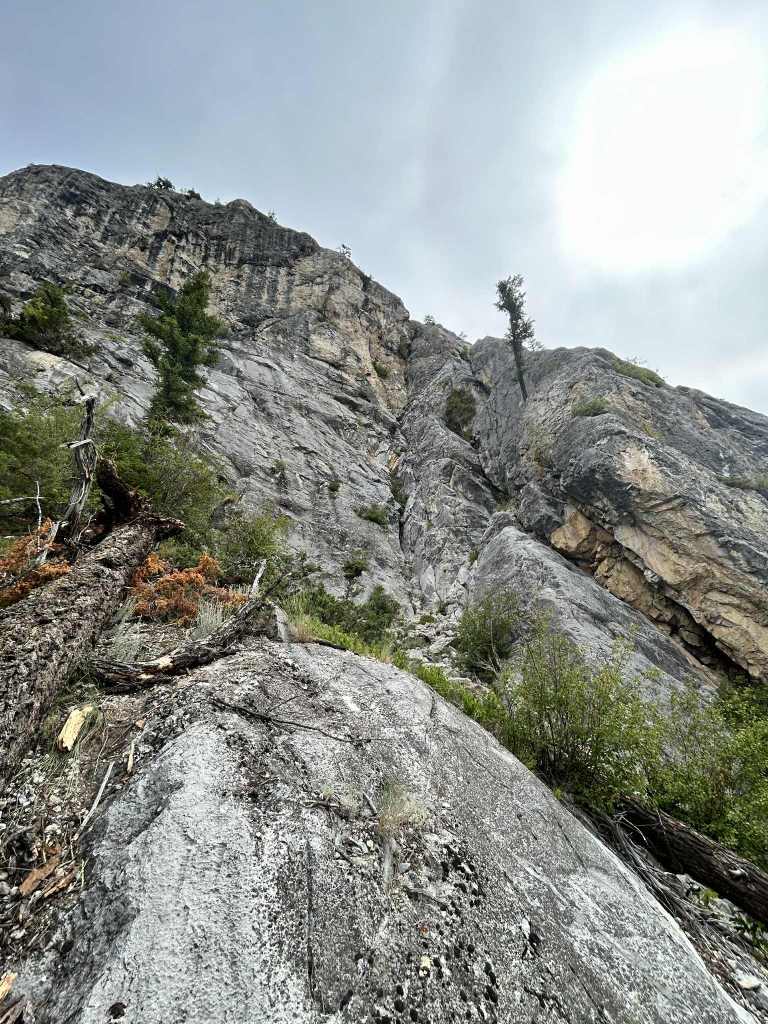
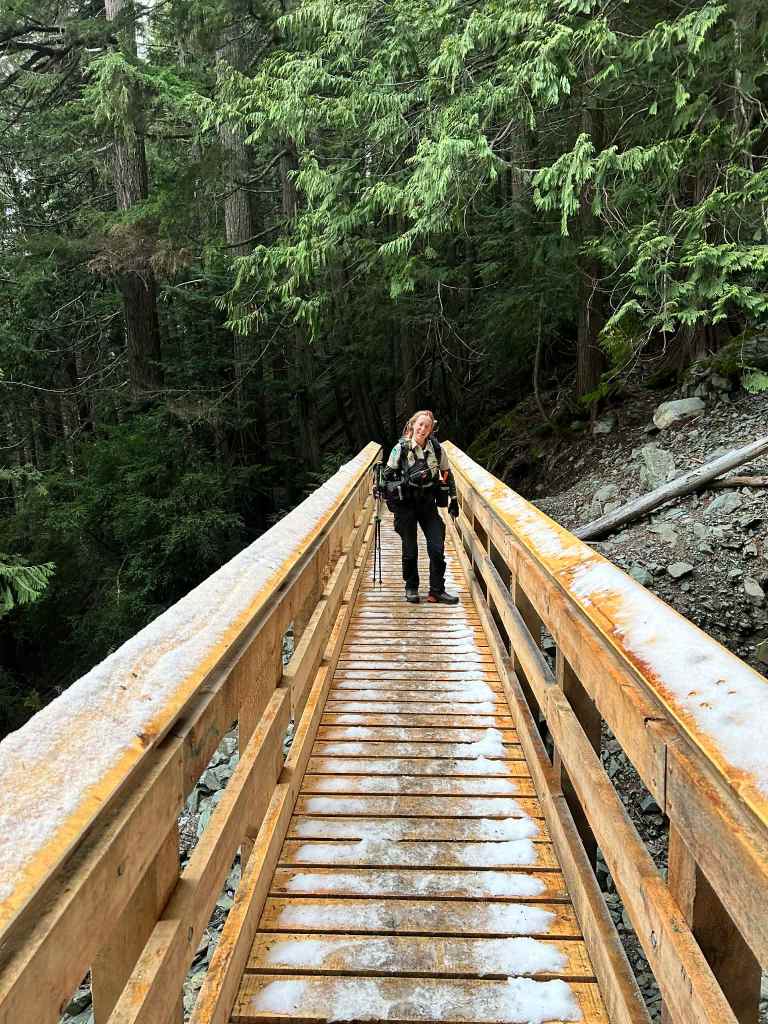
    Andrea and I took the chainsaw for a hike up to kilometre 5.5 on the Rubble Creek trail to buck up a fallen tree. We had a great chat on the way up, and before we knew it, we had the tree bucked up and the trail was clear. We ditched the chainsaw in the woods and continued our hike up. Of course, we ran into 3 more trees which then required the hand saw to come out. Classic!

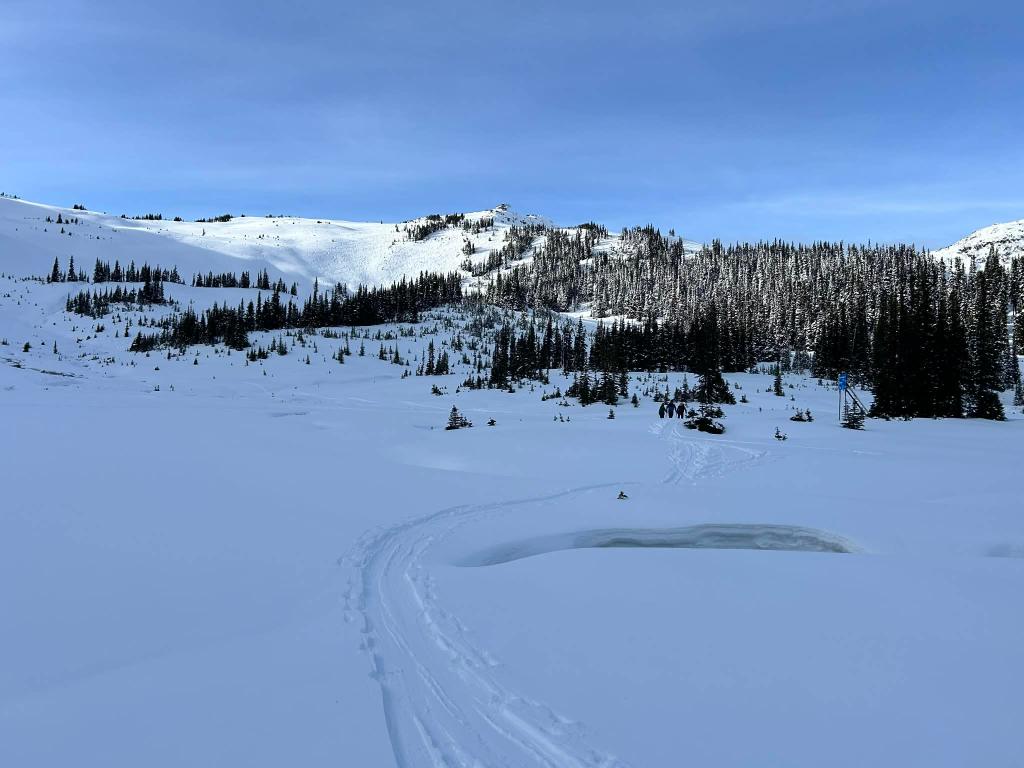
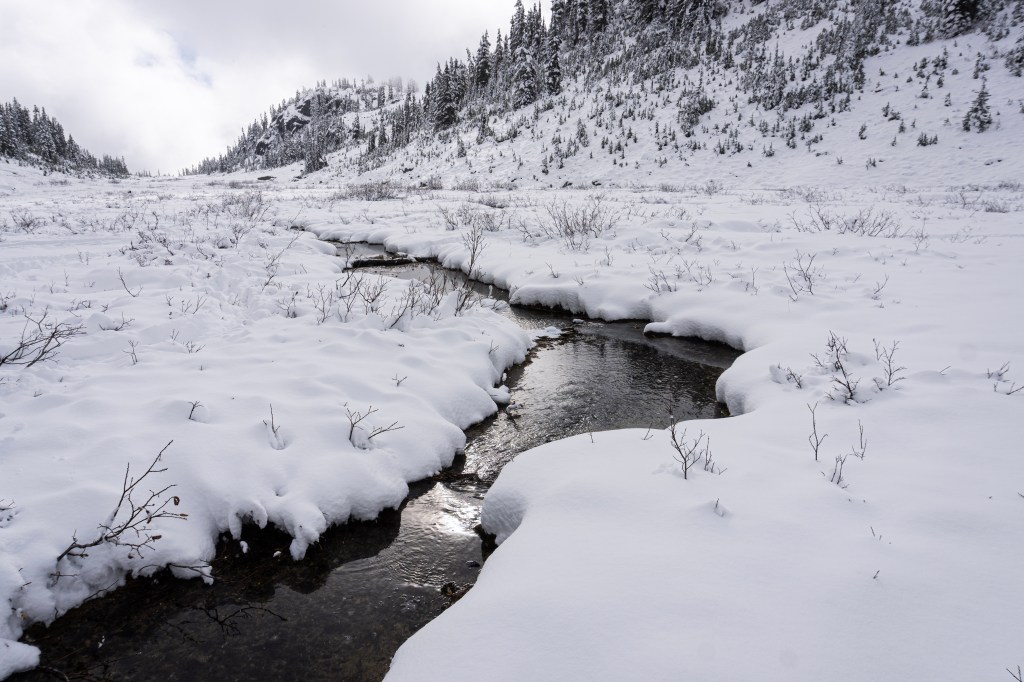
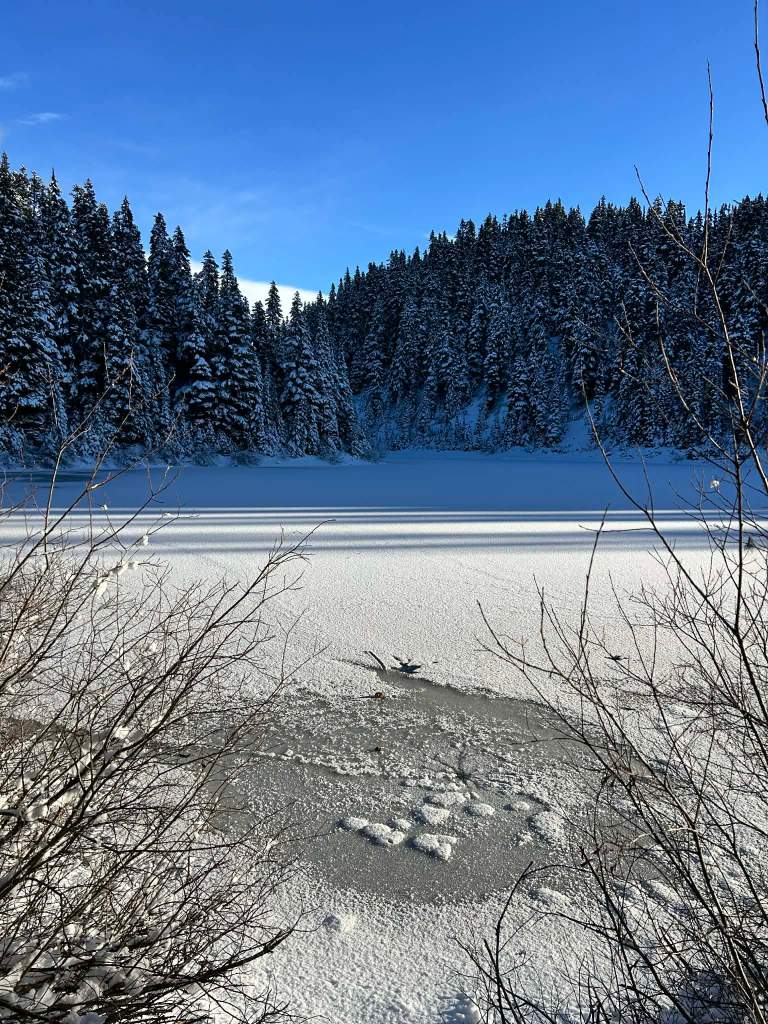
    Next, we went up to kilometer 6.5 to remove some seasonal signage, and then did the same thing at Parnasus Creek. By this point, we were 1km from Garibaldi Lake, and we decided we may as well press on. At the lake, the facilities were in great shape. After a quick cleanup of the Sphynx Shelter and the outhouse, we turned around and made our way back to the work truck. At Garibaldi Lake, there was only 20cm’s of snow. And to answer the timeless question of many a Neve Traverse’er, the lake was not frozen.

    Close to the parking lot, we saw a blur of motion in front of us, looked up, and saw a healthy looking Mule Doe on the trail, eating some plants. I hardly ever see deer in the Sea to Sky, so this was a nice wildlife encounter to finish off a sunny day in the mountains. Bring on the snow! Hiking up to Garibaldi lake it hiking boots at the end of November felt weird. Ski touring up would have felt a bit more status quo.

    Andrea and her chainsaw enjoying the new Rubble Creek Trail bridge at kilometre 2.5. The 2021 atmospheric rivers did a number on the Rubble Creek Trail.
    Why did we leave the chainsaw 2km down the trail…. Andrea still crushed it with the hand saw.
    Garibaldi Lake. What a beautiful corner of the world. Popular for a reason!
    Barrier Lake on a chilly November afternoon.

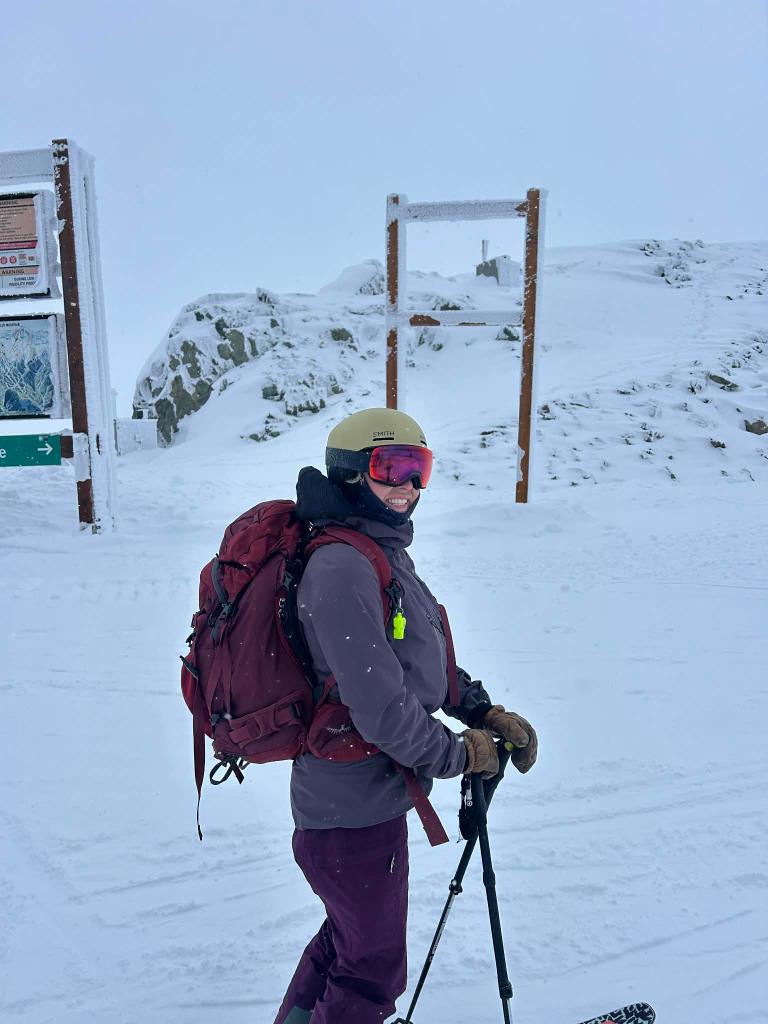
    November 30th, Oboe Drainage

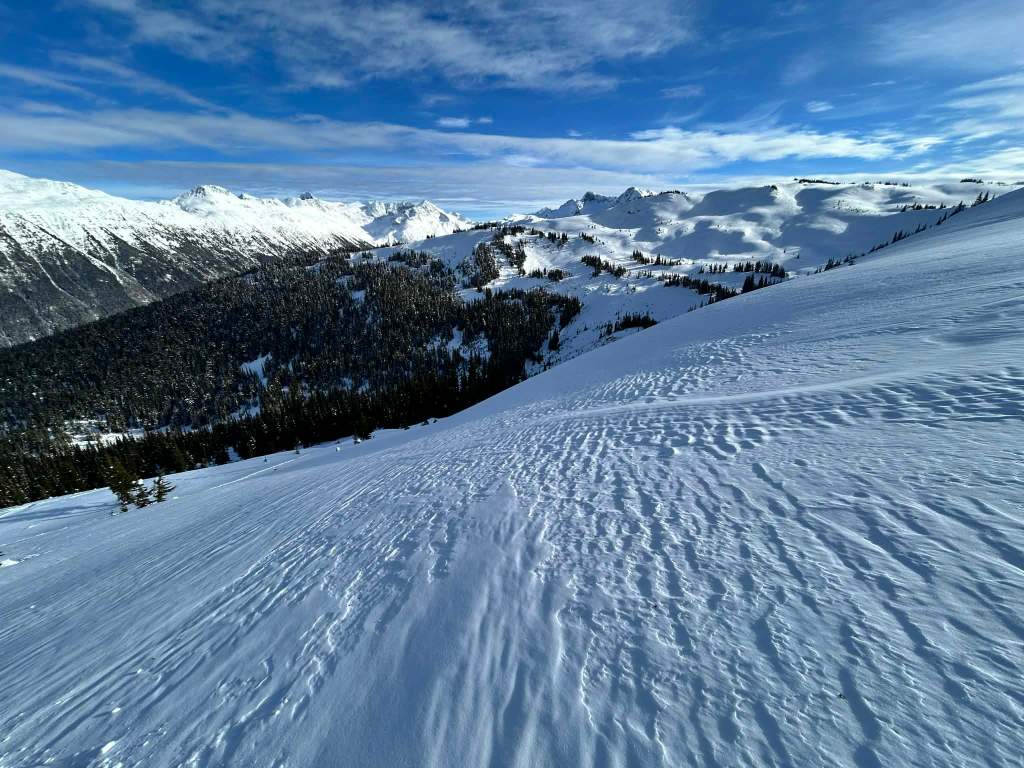
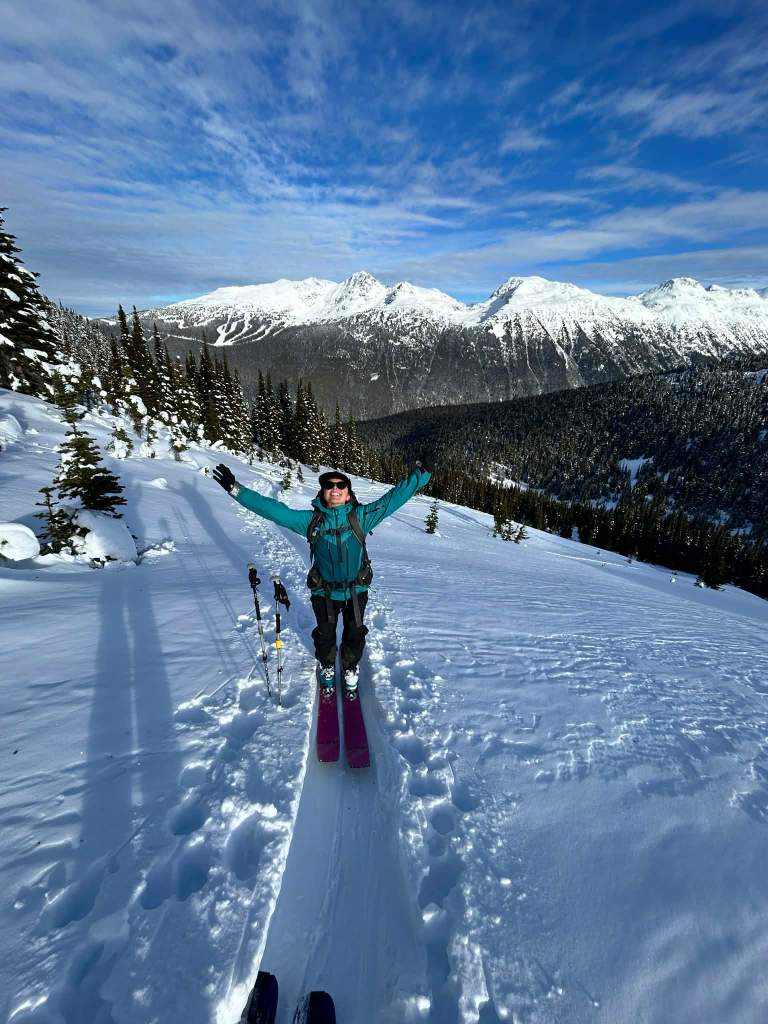
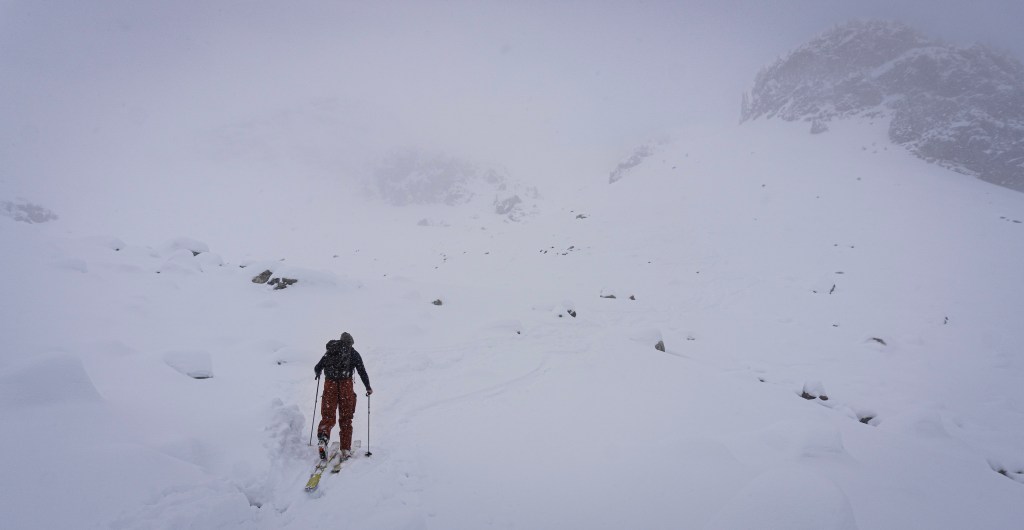
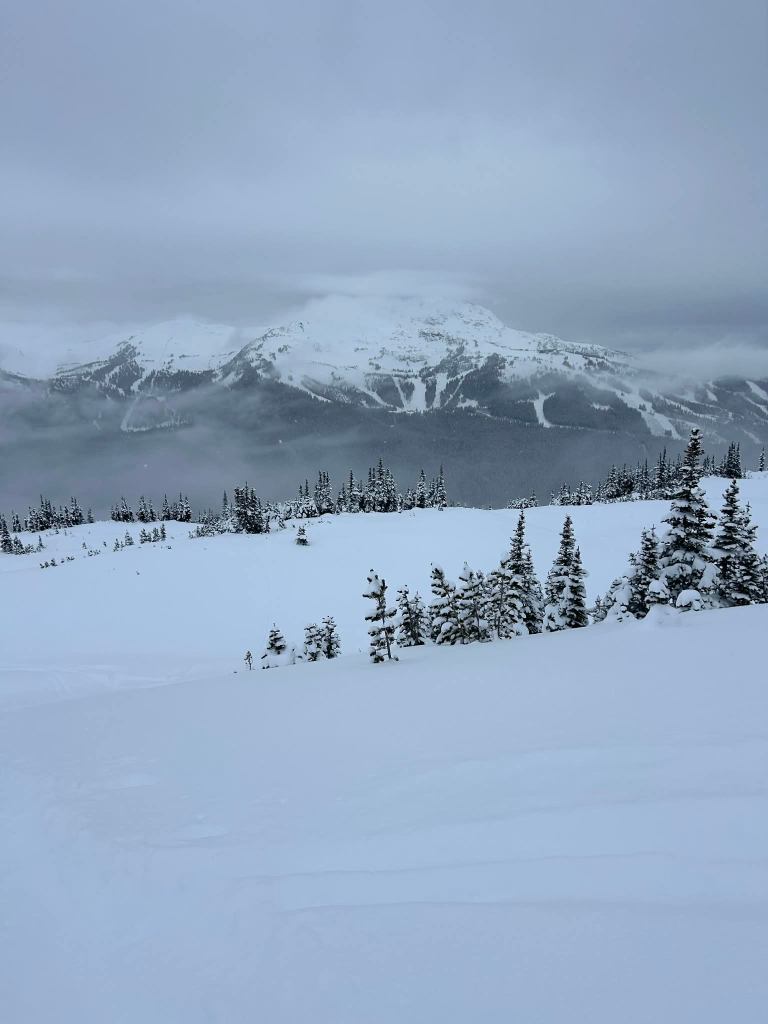
    Andrea, Keegan, Kirsten and I took the lifts up Whistler to head out towards Flute and Oboe. We skinned up the designated uphill track on Pika’s Traverse to the top of Harmony. I couldn’t believe how many people had the same idea that we did. We saw hundreds of ski tourers and boot packers. I guess with the lack of low elevation snow, there’s not a lot of easy options to get up high besides the WB lifts!

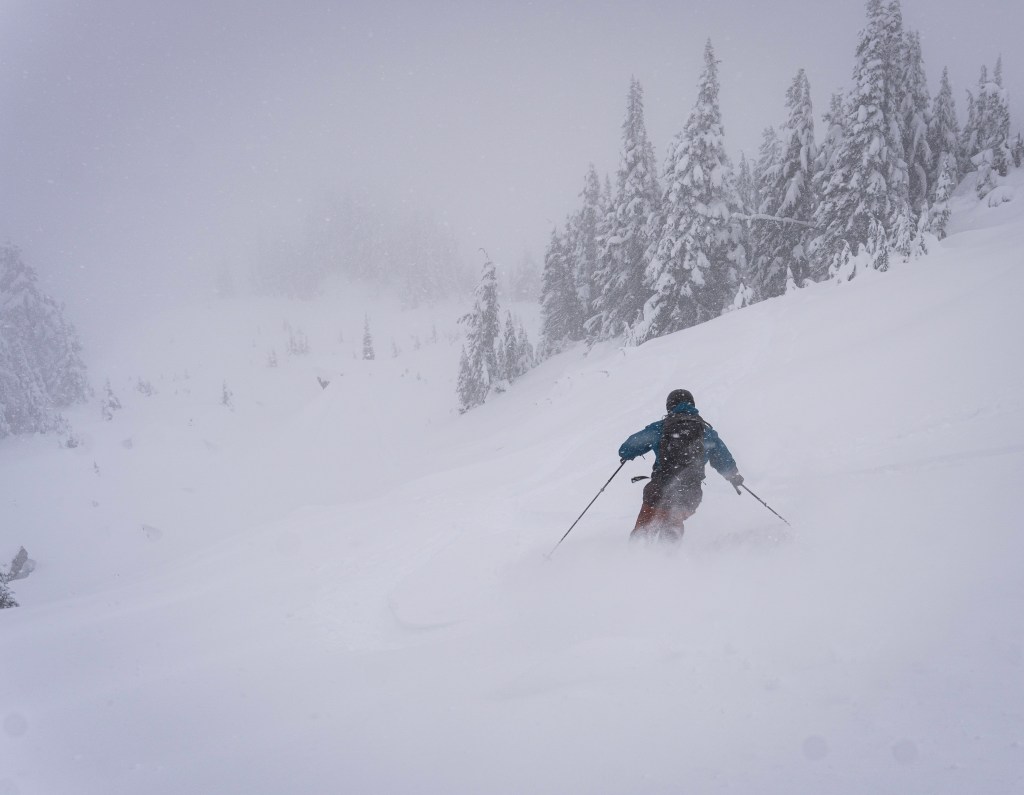
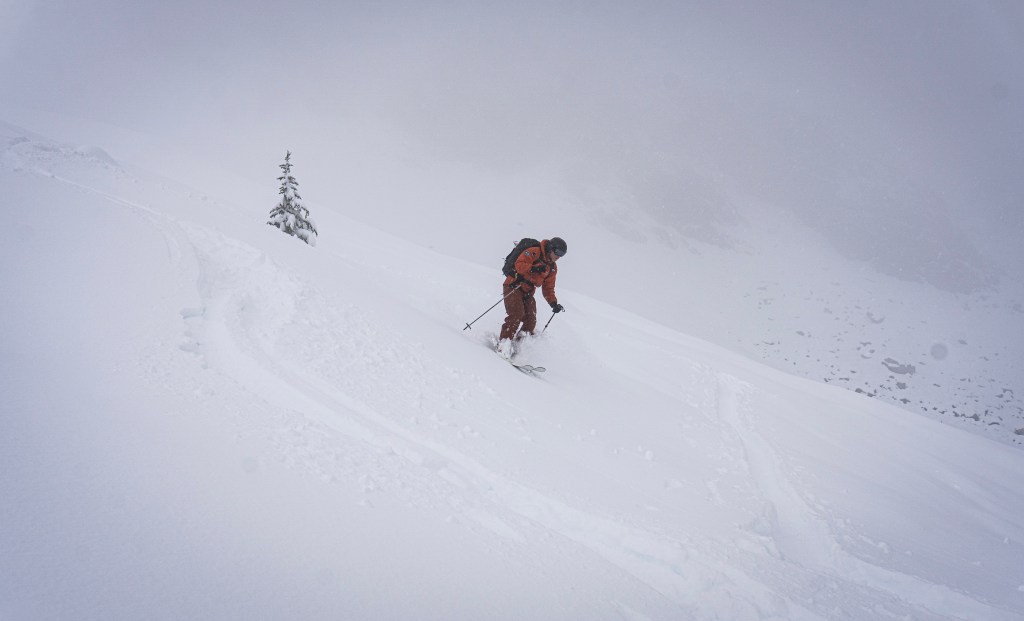
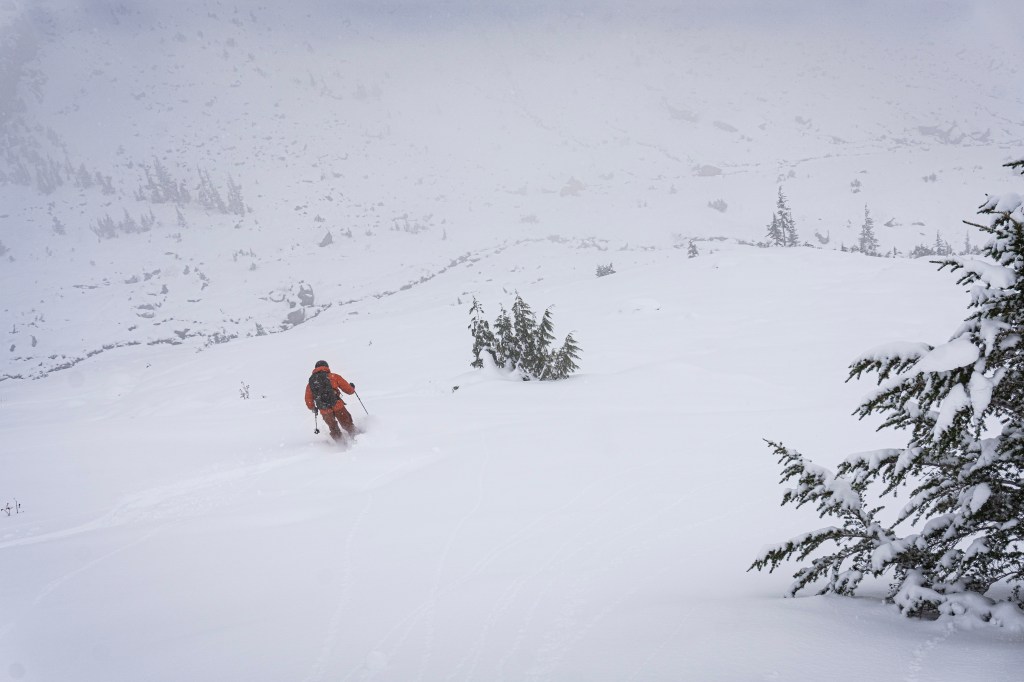
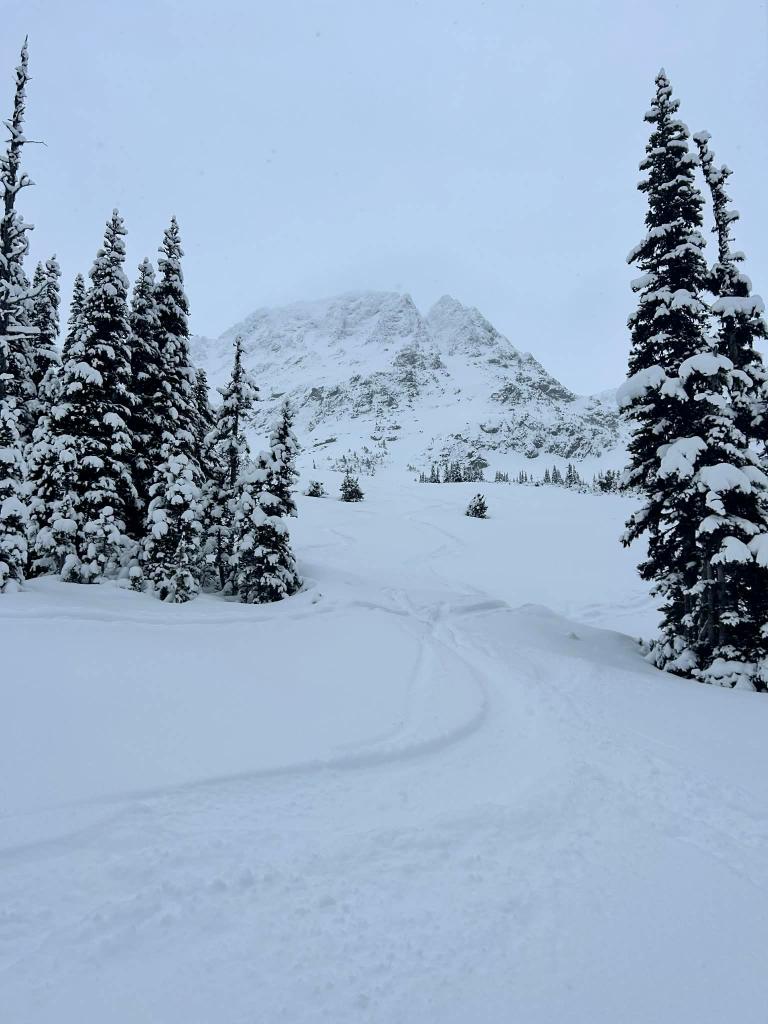
    At the top of Harmony, we skied Burnt Stew and then traveresed over towards Flute bowl. We dropped in near the Staccato Glades and had an excellent powder run towards the bottom of Encore Ridge. From there, we skinned up Moose Meadows to get onto Encore Ridge, and then dropped down the East side of the ridge into Garibaldi Park, skiers left of Flute Central, and skied an excellent run down to Oboe Creek. After skinning back out, we were eventually on top of Lesser Flute, and skied a nice run back down to the Symphony Traverse back to Burnt Stew / Sidewinder. What a great day out. Even though it’s been a slow start to the season after things were looking so great in early November, it’s still possible to find some great turns up high.

    Something to note, however. The past few weeks of cold and dry weather are facetting the upper snowpack. Our thin snowpack also has a large crust down 30-50cm’s pretty much everywhere in the treeline and alpine. Thin snowpack + cold temps + crusts = strong temperature gradients in the snowpack. Unfortunately, there are now facets above and below this crust, and this process will continue to occur as long as we are stuck in this current weather pattern. This will definitely be a layer to watch out for once the storms start rolling in. But until then, I’ll keep enjoying the low avalanche hazard and soft snow that can still be found. The biggest hazard at the moment continues to be rocks, stumps, creeks, and crevasses.

    Kirsten and Keegan with the unplanned wardrobe and ski coordination.
    Kirsten enjoying some soft snow.
    Andrea ripping!
    Sir Keegan.
    Bottom of Encore Ridge looking back at Staccato Glades.
    Heading up. The author huffing and puffing and sweating his way up Flute Cruiser.
    Into the sun
    Looking out towards Oboe, Cowboy Ridge, and the Spearhead Traverse.
    The author. Great turns in Garibaldi Park down into Oboe Creek off the East side of Flute.
    All smiles from Kirsten in the Oboe Drainage.
    Happy that winter can still be found in the high country.

  • Metal Dome – November 2nd

    Tyler, Peggy and I went up to Metal Dome to see if we could sneak in some early-November turns. It has been a great start to the season!

    When we arrived at the juction for Metal Dome on the Brandywine FSR, there were about a dozen other vehicles parked. It was great to see so many people getting out and enjoying the early season skiing. By the end of the day, we saw somewhere between 75-100 other people getting after it. Metal Dome has become a classic early season touring destination.

    At the trailhead, there was roughly 20cms of snow, and skinning up was still a bit of a sporty endeavor. Snowpack depth progressively improved with elevation. When we exited the woods at the PMSC rescue cache at 1600m, I probed an HS of 95cm. Nice!

    As we continued up, the visibility deteriorated, and the winds picked up. Although many slopes were still below threshold for avalanches, we started to see signs of instability. The storm that had come through the previous day started cold, warmed up, and then cooled off again. We could feel a temperature crust down about 20cm’s within the storm snow as we got up into treeline terrain. And with moderate to strong winds, we could feel the storm slab setting up. It felt stubborn, but combined with low-tide conditions and zero visibility, we decided to transition at 1850 meters and do some Braille skiing through the meadows.

    Overall the skiing was pretty good! This felt like the first proper day of skiing this season. We made it back down to about 1400m before boot packing the final stretch back to the truck. A fun day out with a great crew.

    Starting to feel like winter up in the meadows.
    Onward and upward.
    Stormy transition. This was our high point.
    Tyler feeling the pow, but not seeing a whole lot. Visibility was minimal.
    Speedy turns, good snow, and limited visibility.
    This slope had some hidden rocks down the centre, but the sides were skiing nicely!
    Peggy coming in hot!
    More pow turns.
    All smiles. Winter is here!
  • Brandywine October Ski Tour

    Recently, we’ve had a series of storms hit the South Coast that have dumped 50-100cm’s of snow in the higher terrain from Squamish through Pemberton. I felt pretty sure that there wasn’t enough snow to ski, but the night before this trip I saw a social media post from some folks heading up Brandywine. I try not to get too influenced by posts, but the folks who posted the photos sent me an accurate description of what to expect. I had nothing planned, and Tyler had the day off, so we decided to go for a walk with our skis and hopefully make a few turns while avoiding the tib fib sharks that were lurking just beneath the surface.

    We left Squamish and drove up the Brandywine FSR to the upper parking area for Brandywine Meadows. We hit snow, but didn’t need chains. This road has a few deep cross ditches near the top so high clearance is a must. Fortunately, just like half of Squamish, I have a Tacoma.

    We started skinning right from the truck. This is a generous description, as we were skinning on snow, dirt, through creeks, and mud. After a bit of skin globbing, we were in the meadows proper, and coverage improved. However, a few major creek crossings required skis to be taken off and chucked, which was then followed by less than graceful boulder hopping in ski boots. No wet boots on the way up! On the descent, there was an unexpected cold plunge of a ski boot into a creek.

    We started skinning up above the meadows, and before too long, we were getting into the alpine. This was right when the weather rolled in. Besides a few sucker holes in the clouds, we were mostly socked in from this point until we dropped elevation back into the valley after our ski descent.

    Tyler skinning up into the whiteout.

    The weather did lift at times, and as we were skinning up to a bench at just below 2000m, we got a good look at the terrain around us. What a spot! And with 80cm’s, it was feeling wintery.

    Tyler pressing onward up to a bench, which would be our hight point.

    We got to the bench feature and had some lunch. The weather rolled in at this point and we were in the whiteout again. Other than the odd isolated slope with a smooth ground surface, everything was still below threshold for avalanches, but our main concern was visibility and low tide conditions. We didn’t want to ski any alpine features without being able to see, with the risk of finding tib fib sharks under the snow. We decided to ski down from 2000m. With the conditions, there wasn’t much skiable any higher than this anyway.

    We picked our way down, and actually found a few good turns. There were some rocks that were scraped too, but that wasn’t surprising. We kept our turns and our thoughts light. Overall, expecations were slightly exceeded.

    Tyler finding a nice pocket of snow on the way down.
    Tyler heading down to the meadows. Although the snow was inviting, things were rapidly getting thinner as we dropped elevations. We took it very easy down here.
    Dodging creeks, trees, rocks, and holes as Tyler cruises towards the meadows.
    I love the looks of a creek passing through a snowy landscape, but I don’t like navigating this type of terrain on skis quite as much.

    It felt good to get out ski touring for day one of the season in October. Hopefully the storms continue and we continue to get some early season skiing opportunities. Thanks Tyler for a fun day out!

  • Mt Habrich – Escape Velocity – October 2025

    Weather and daylight are two of the major factors when planning activities in Squamish during the fall season. When a few days of high pressure set up in early October, AJ, Peggy and I decided that it would be a fun day to climb something on Mt Habrich, knowing that it would be potentially be the last opportunity before the late-Fall parade of storms started crashing into the South Coast.

    We left Squamish at a reasonable hour and made our way up the Indian Arm FSR to the Shannon FSR. There is extensive industrial activity on the Indian Arm, and there will be for the next few years, due to the pipeline work. Traffic flaggers are staged at the base of the Indian Arm FSR and at the junction to the Shannon FSR. We quickly touched base with the flagger at the base of the Indian Arm FSR, and had no issues getting clearance to drive up to the Shannon FSR junction. Having a radio with resource road channels is recommended.

    Overall, the road conditions are in excellent shape with the industrial activity going on. The Sea to Sky Gondola recently installed hydro towers up the Shannon FSR, so that road is also in good shape. You can park in a dedicated pullout near a locked gate, and walk about 20 minutes up the remaining stretch of the FSR to reach the top of the Sea to Sky Gondola.

    We were still deciding what route to take up Mt Habrich once we parked. AJ had climbed Earthshine (10a) earlier in the summer, and was interested in checking out Escape Velocity (5.9). I had climbed Escape Velocity 10 years ago back in 2015, and didn’t have a preference. Peggy was psyched to climb anything on a sunny October day. We decided on Escape Velocity, and started to make our way up to the route.

    Peggy and AJ putting their heads down and grinding up the Habrich Climbers Access Trail

    The trail to the base of the Habrich routes startes on a casual decomissioned FSR’s for a few km, heading up the Sky Pilot Valley. At an obvious junction, the climbers’ access trail splits to the left (North), and changes in character to a slog fest for a few km, gaining close to 1000m in elevation.

    AJ topping out into the sub alpine heather after grinding up the steep access trail. Sky Pilot and Co Pilot in the background.

    Once we got to the base of the route, we realized we were in for a slightly more alpine-y day than we had set out for. Tempuratures were sub-zero on the shady north face of Mt Habrich, where the 7 pitches of Escape Velocity are positioned. We could see the crux on pitch 2 from the base of the climb, and it looked damp. We decided to layer up and give the route a try. With all anchor stations bolted, and the climbing moderate, we figured we could rap off at any point if the conditions were too unpleasant.

    AJ thinking warm thoughts as Peggy leads up the 5.9 crux on pitch 2.

    I quickly lead pitch 1, which involves a few moves of 5.4 up to the anchor for a grand total of 10m. This pitch could be solo climbed, however with frozen hands, awkward slab moves with death exposure down the north gully below, and because we’re note all that hardcore, we decided to throw the rope on.

    Peggy then set off on pitch 2. As she pulled through the crux, she found a nice patch of ice where an ideal handjam could have made things easier. This was the theme of the day – trying to stay warm, avoiding ice and damp sections, and placing our hands in and around mountain goat poop at times by mistake. Apparently Habrich is ideal winter goat range.

    AJ topping out on pitch 2, with the sun still a very far distance away.

    After pitch 2, the climbing eases off. Although I had climbed this route back in 2015, I hadn’t remembered the climbing being so broken up with ledges, vegetation, and rock moves. It had more of an alpine feel than I had remembered, and due to the broken up nature of the climb, it wasn’t always perfectly clear where the anchor stations would be located. Nothing too crazy, but keep a close eye out for the stations or you might just get slowed down a bit.

    Peggy at a belay station. The hot-pink rope unfortunately did not help with the cold fingers.

    We were convinved we had the area to ourselves, so we were surprised when we heard shouting in the distance. We looked up and saw that a paraglider had launched off the summit and was hooting and hollering on their flight off the peak. Just another day in Squamish.

    Unkown paraglider banking a turn into the sun off the summit of Mt Habrich.

    Getting closer to the summit, as AJ was leading a pitch, we heard laughter and relief. After a few hours in the shade, we were finally getting into the sun. It sure felt great to warm up.

    All smiles getting into the sun.
    Peggy cruising up the final 5.7 pitch to the summit. Traversing in and out of the sun.
    AJ Topping out on the final pitch.
    The final steps to the true summit
    On top of Habrich, with the Sky Pilot Group in the background.
    Peggy smiling at the top anchor station.

    We enjoyed some lunch on the summit while basking in the sun and warming up a bit. Tempuratures were in the 8-10 degree range, but felt infinitely warmer than the shady pitches below.

    There’s a few descent options off Habrich. You can downclimb the scramble route on the NE side of the mountain, you can rap off in the Life on Earth / Earth Shine area off the south side of the mountain, or you can rap Escape Velocity. All raps are less than 30 metres off Escape Velocity, can can be done with a single rope. We decided to rap the way we came up, which in total took a little over an hour.

    We stacked our rappels which helped speed up the process
    AJ doing some rope management. The raps are easy, but with the vegetation and ledges, they required a bit of additional rope management.
    AJ and Peggy doing some rope chucking
    Peggy heading down the mountain.
    Nearing the base of the route. All smiles in the sun.

    At the base of the route, we quickly packed up and started our hike back down to the truck. A few hours late, we were arrived at the truck and were only 10 minutes late getting AJ to his evening SAR meeting.

    All and all, it was a great way to spend a sunny October day. We were truck to truck in a little over 10 hours. We were climbing a bit slowly due to the conditions and a few route finding hiccups, but overall we had a great day out in the mountains. Overally, the climbing on Escape Velocity is nothing to write home about. There are a few good quality pitches, but it’s definitely a ledgy and bushy affair at times. But the position of the climb is spectacular, and it sure was nice having bolted stations to speed up the climbing and the raps. It’s certainly worth checking out. The topo on Quickdraw Publications is a good place to get started for trip planning: https://quickdrawpublications.com/wp-content/uploads/topos/Habrich_Escape_Velocity.pdf

    Gear used for the climb: 70m Triple Rated Rope, single rack to 3 with a few extra hand sized pieces, nuts, 8 alpine draws.

  • Blackcomb Buttress – August 2025

    With a heatwave settling in over Southwest BC, AJ and I decided on some higher elevation climbing to chase down some cooler temps. We skimmed through the Alpine Select and decided to give Blackcomb Buttress a try. This climb had been on my radar for some time, and it felt like a good opportunity to go check it out and give it a try.

    There are four prominent lines that can be chosen to climb up Blackcomb Buttress. On lookers left of DOA, there are 3 ribs that form The Black Ribs. All of which go at around 5.7. On lookers right of DOA, is the DOA buttress, which also goes at 5.7. I reached out to my friend Jason Budd who had climbed most of the lines, and he said his favourite was the far lookers left rib. We decided to go with that. Thanks Jason for the beta!

    Heading up via Lakeside to the Blackcomb Buttress.
    A bit of boulder hopping and scree to get to the base of the climbing

    Overall, the approach to Blackcomb Buttress is about as Euro as it gets in Canada. We took the Blackcomb Gondola up, and after a short hour and 15 minute approach, we were at the climb. Very civilized.

    AJ cruising up mid-5th buttress climbing. Awesome position.

    Overall, the climbing is very type 1 fun. Although there’s still a bit of loose and funky rock in isolated spots on the route, for the most part the climbing is on solid granite. For the most part, the buttress goes at mid-5th, with a few moves of 5.7 on the upper headwall pitch. Pitches can be simuled or broken up. We did the climb in 4 long pitches. The climbing can easily be protected, and there are many options to build anchors anywhere on the route.

    AJ checking out the crux headwall moves near the summit. At most they go at 5.7 for a few metres. Many options exist to navigate this section. We did find some funky and hollow rock bands on this section, so caution is advised.
    Looking over from near the summit, an unkown climber topping out on top of DOA buttress.
    AJ and the author on the summit.
    Looking out towards Decker and the Spearhead. These glaciers are taking an absolute thrashing with a warmer climate.

    The quickest way off Blackcomb is to hike down boulder fields towards Body Bag Bowl. Then, hike down Body Bag Bowl and wrap around into Lakeside and connect with trails back to the Blackcomb Gondola. The descent is a bit unpleasant but it goes by quickly, and is well worth it for the great climbing to be had on the way up.

    Back at Lakeside, looking up at Blackcomb Buttress.

    Blackcomb Buttress is a fun objective worth checking out. The rock quality is quite solid for the alpine, the views are phenomenal, the access is easy, and the descent down the gondola and straight to RMU was a nice way to finish off the day.

    Gear we brought: Single 70m rope. Single rack of BD cams to 3″. Half a dozen alpine draws. Nuts. Anchor material. We climbed the route in approach shoes and at no point felt that rock shoes were necessary, but if you are at questioning whether you need rock shoes, the approach is so quick that it doesn’t hurt to pack them.

  • Peggy and I were reading the Alpine Select and stumbled on the description for Cassiope and Saxifrage Peaks. The description looked great – good quality rock, ridgeline linkups, views in all directions, and sidewalks in the sky. I gave Tyler a call that evening, and early the next morning the three of us were driving up towards Pemberton.

    Cassiope and Saxifrage Peaks are located NE of Pemberton. We drove through Mount Currie, turned onto the Spetch Creek FSR and parked at the Valentine Lake trailhead. From Squamish to trailhead was about 1.5 hours.

    The approach to Valentine Lake flew by. The trail starts in a nice section of forest and follows Spetch Creek for a bit, before benching out into some sub-alpine meadows. We soon arrived at Valentine Lake. The views of Cassiope and Saxifrage explode into view from the lake. The mountains looked impressive, and we were psyched to give the linkup a go. We also had some great views looking back towards Mt Currie, Hibache Ridge, and peaks above Lillooet Lake and the Mkwal’ts Conservancy.

    Above Valentine Lake, the trail ended, and we gained the saddle directly behind the lake between the two peaks.

    Tyler navigating some large boulders, with Saxifrage and its SE ridge behind (right). This would be our route up Saxifrage.

    We worked our way up the NW ridge of Cassiope. There were a few 3rd and 4th class moves, however these were easily navigated.

    Approaching Cassiope Peak
    Tyle on top of Cassiope, looking down at Lillooet Lake.
    Peggy cruising along a sidewalk in the sky feature on Cassiope.

    Back at the saddle from Cassiope Peak, we started making our way up the SE ridge of Saxifrage. We approached this section with some question marks. The ridge was an obvious feature, but the route descriptions were a bit varied. The Scrambles of SW BC book described this ridge as a 3rd class scramble, while the Alpine Select mentioned this route had sections of low 5th and was a bit more serious. We gave the ridge a go, and found it was somewhere in between these descriptions. There were a few 5th class sections, but they were entirely doable, and overall the rock on the ridge was solid.

    Tyler coming up the 5.4 ish slab feature on the SE ridge of Saxifrage. Apparently you can bypass this, but we found it to be totally fine.
    Top of Saxifrage
    Coming off Saxifrage.

    The descent from Saxifrage is non-technical, but does involve hiking downhill forever on steep alpine meadow slopes. Valentine Lake is constantly in view, so the route finding is easy. Just aim for the lake.

    Tyler looking at Valentine Lake from Saxifrage. The lake gets its name from its heart shaped look.
    Finally made it back to the lake. After a quick swim, we were on our way to the truck.
    Making our way to the trailhead.

    What a great day in the mountains. We underestimated distances and elevation profiles so we were a bit bagged by the time we made it to the truck, but a Mile One dinner stop on the way home helped with the calorie deficit.

    Overall, we covered 24km distance and did 2000m of elevation gain. It was a big day out, but Tyler had to go to work the next day so we didn’t camp. Valentine Lake looks like a prime camping spot if you wanted to break up the peaks over 2 days.

  • On a sunny day in July, Peggy and I both had the day off work, and we decided we wanted to go explore a climb that was recently put up in the Brandywine Meadows area called Bastardo. A multi-pitch bolted alpine route above a beautiful mountain valley on a sunny day seemed like a no brainer.

    Brandywine Meadows. Recreation Sites and Trails has put work into trail realignments and drainage in this area.

    We parked at the start of the Metal Dome Trail, instead of driving the last 2km to the Brandywine Meadows upper lot. We decided that we wanted to try and link up Metal Dome from the top of the climb instead of heading back into the Brandywine Meadows valley, so this would allow us to finish the day at the truck instead of an additional 2km of FSR walking after a long day out. I’d suggest doing this.

    The wildflowers were exploding in the valley. We were enjoying them thoroughly, but also were looking out for bears. This is prime bear habbitat, and Grizzly Bears regularly roam these meadows. No wildlife spotted today.
    Topping up on water. We didn’t know what the water situation would be like after this. Turns out, there’s plenty of fill up spots as you approach the base of the climb.

    Two hours later, we were at the base of the climb. The GPS coordinates for the start of the route as found on Quickdraw Publications website was bang on. We had no issues finding the start of the climb.

    The first few pitches were straight forward. The folks that put up this route did a great job with bolting to limit rope drag, but it’s an alpine route. Alpine draws are pretty much mandatory if you want to avoid serious rope drag, as some of the climbs wander back and fourth to maximize rock quality.

    Peggy leading us up a pitch.

    Once we got up to the middle of the climb, the pitches improved significantly. I lead us up the crux pitch which involved a few “solid” 5.8 moves. This section is called The Black Roof. The moves are all there when mantling up and over the roof. The bolt hanger that protected the crux move was loose, but fortunately I had a nut tool and was able to tighten it up a bit.

    Peggy following up. The rock got progressively better in the middle and upper pitches (besides the last pitch).

    As approached the top, the views of Brandywine Mountain and Brandywine Glacier really came into picture. Even in July, we still had a few patches of snow on-route, but these didn’t interfere with the climbing at all. It felt great getting up into the alpine.

    Nearing the base of the last pitch. The rock quality got worse from here.

    The last pitch, as the topo describes, is friable. The black rock is quite flakey. We weren’t concerned about pulling off large blocks, but we did take care with each hand hold and foot hold so we didn’t break anything off and go for a 5.4 screamer.

    On top, we ate some lunch, watched a murder of crows fly overhead, and then started traversing a 4th class ridge over towards Metal Dome. This ridge was really fun, and had great views of Metal Dome Glacier and down towards the Callaghan Valley on the north side, and straight down to Brandywine Meadows on the south side.

    Down climbing a notch on the ridge over to Metal Dome. This was the crux of the ridge. It would be easy to rap this with some webbing or cord slung aroudn a boulder, but we found the down climb to be straightforward. The rock here was solid.

    Approaching Metal Dome, the exposure let off and turned into pleasant hiking. The descent off Metal Dome was non-technical, but the route finding isn’t super obvious. Having a GPS track for the Metal Dome trail was helpful.

    We were car to car in just under 10 hours. The approach to the climb took about 2 hours. We pitched out all 10 pitches, but simulclimbing is definitely possible on this route. The descent took longer than we expected, so give yourself plenty of time to descend off the route. Overall, the climbing is quite good, with some stellar pitches mixed in. The bolting felt generous, and with about a dozen alpine draws, we were comfortable. All anchors are fixed, so rapping off the route is doable, but hiking up and over Metal Dome was much more enjoyable. There is additional route developement occuring in the Brandywine Area. There’s some great potential for new routing in this area! What makes this climb is the position of the route. The views of the surrounding meadows, mountains, glaciers and valleys are next level. Finally, a big shout out to the folks that established this route. The topo on Quickdraw Publications is extremely accurate. A lot of work went into developing this climb. Get on i!

  • Nina and I decided to try Chewbacca’s, a 3 pitch 10b on the Gobsmacking Wall. The Squamish Select uses words like “burley” and “hard for the grade”. I typically don’t climb much harder than 10a / 10b on lead, so this felt like a good outing to push into some challenging-for-me climbing.

    Our plan was to swap leads. I ended up taking the first pitch (10a) and battled about as hard as I’ve ever battled on a rock climb. By the top of the pitch, the amount of sweat that had been produced was slightly alarming.

    Nina took pitch 2, and again, I got my ass kicked. This pitch is a 10a chimney pitch, which felt extremely burley for the grade. I made some actual Chewbacca noises on my way up while trying way too hard. Perhaps this is where the name of the route comes from? (Insert loud Chewbacca noise here).

    Looking down at the second pitch.

    Fortunately, Nina is a badass climber who is significantly stronger than I am, and she got us up the crux 3rd pitch. This pitch involves a heady traverse where the gear is at your feet, as you step left into a dihedral feature. As I was seconding up this, I felt thankful that Nina had lead this pitch. I would have been scared and sweaty at the same time – a combo I often find myself experiencing, but try actively to avoid.

    At the station looking up at pitch 3. This is the crux pitch. Fun, but heady getting up and left into the dihedral.

    We topped out and enjoyed the views before walking back down to the Shannon Falls parking lot. For the average 10a/10b climber, this route will likely feel challenging. It’s a great climb, but prepare for battle.

  • Although the forecast was calling for 30 degree highs in Squamish, Nina and I decided to climb Born Again on the Apron. We started early so we’d mostly be in the shade, with the plan of getting off the route before the sun hit The Apron.

    I linked the first two pitches, and belayed Nina up. This was in the 5.9 range, and was a mix of gear and bolts. Nothing felt too difficult here, and there were no runout sections.

    Nina took pitch 3 – a 5.9 fingers dihedral. This pitch was one of my favourites. Typically, finger sized crack climbing isn’t my style as my fingers are somewhat sausage like, and don’t fit into finger cracks all that well. But this pitch worked well for me and it was all smiles.

    Next, I lead the crux 10b pitch. This involves a well protected slab traverse which crosses over towards Diedre. I find slab / technical face climbing are my strongest areas, and I was psyched to get the send on this pitch. I’m not a particularly strong rock climber, so a 10b lead for me doesn’t always go clean.

    Nina coming up the 10b slab traverse. Well protected, exposed, and fun.

    Nina then took on pitch 5, which involved briefly climbing over and down into Diedre for a few metres, before climbing out and left back onto the main face. This pitch was awesome as well. We felt thankful that we were on Born Again in this section. Diedre had 6 parties on the first 3 pitches, while we had the route all to ourselves.

    Yours truly coming up pitch 5. This is right were the climb deviates away from Diedre. Busy day on Diedre.

    I took on pitch 6, which is a 5.9 steep hands to fist splitter. I was cruising up to the final bulge section, when suddenly I was falling before I knew what was happening. I’m not totaly sure what happened, but I took a 10 footer on some solid gear. All was well, and I climbed through the bulge no problem on the 2nd attempt. Perhaps complaicency? Sometimes falls happen when we don’t expect them.

    The author heading up pitch 6. This was shortly before I took a small whipper.

    Nina then linked the last 2 pitches to get us to the top of the Apron. Just as I was getting to the anchor, the sun came out and blasted us with heat. We felt happy we were heading down at that point. We took the Moonwalk back down, and before we knew it we were back at the truck.

    Nina aka Ni-Gnar linking the last 2 pitches. The sun was just starting to crest over the upper Chief at this point.
    Heading down the Moonwalk.

    Born Again has every style of climbing, all at a very high quality. From slab, to splitter cracks, to dihedrals, to technical face climbing, there’s no shortage of climbing styles. This is a great alternative to many of the more popular Apron routes, especially on a busy day. We took a double rack, Set of nuts, about a dozen draws, and used a 70m rope. All anchors are fixed.

    This climb was awesome. It had been on my list for a while, partially for the climbing, and also because the first ascentionists Kris, Fraser, and Phil are all friends from SAR. Thanks gents, for establishing a great route!

  • Peggy and I went to a wedding in the Slocan Valley, and decided to take a longer loop home to visit friends in Kamloops and then head through Marble Canyon for a bit of climbing. We were on a time crunch to get back to Squamish, so we knew we didn’t have time to climb the mega classics like The Goat and Guaranteed Rugged. We did a bit of research on Mountain Project and found a shorter multi pitch called Beers with Birgit, that went at 10a. We decided to go for it.

    Neither of us had climbed in Marble Canyon before, and had only climbed on limestone a few times. We were excited to see a new place and climb on some different rock than the Squamish granite that we’re so used to.

    Peggy and I swapped leads, and found the climbing to be enjoyable. Most of the climbing was on solid grey limestone, but there were bands of chossy red limestone in specific areas that required caution. Rockfall hazard is simply a reality of climbing in Marble Canyon, just like it is anywhere else, but perhaps with more frequency here.

    Base of the route
    Peggy cruising up some compact grey limestone with the beautiful turquoise blue lakes of the canyon in the background.

    We got to the base of the final pitch, which was supposed to be the stellar pitch of the route. We looked at our watches and realized we were out of time, and we started rapping down.

    Overall, this climb was great. It’s a fully bolted route with fixed anchors. The approach from the highway was about 15 minutes, and route finding was straightforward. We can’t wait to go back and spend more time here, and climb a variety of routes in the canyon.